JavaFX Episode 1
November 27th, 2020I was looking for a framework similar to WPF in the .net world or to the Android’s approach: design the UI within an XML document and automatically wire it up to its controller and to its model. Since I have had a longer break in Java, the last thing I knew was Swing and SWT. The first research in the Internet gave the answer: JavaFX.
- For Android or WPF/MVVM folks pretty straight-forward to jump into.
- Pretty nice look and feel, customizable, e.g. via a CSS.
- Clean API, I find it personally much better than Swing.
- Typical Java nightmare* if you just want to release a standalone app.
* it was 20 years ago: you want to focus on your code, on your business logic, but no… First, you have to dance this odd dance with setting classpath, java home, path and you have no idea, where the JVM was looking for the classes that it could not find. Now, a dejavu: classpath seems to be good now, but we have modules that can’t be found. More about it just below.
Get prepared
You will need an appropriate JDK version and the JavaFX itself. It seems, it has changed over the time and (probably) only the JRE/JDK 8 did include JavaFX. My choice was JDK 14 and JavaFX 15, although I’ve set the code compatibility down to 11.
- The early access build did work as well, but made additional headaches as the files are named differently and could not be found by the framework :).
A new project
I’m used to Eclipse, so that was my IDE of choice. First, create a new project of a Maven type. It is not a must, but makes a lot of things easier.
- Archetype: org.apache.maven.archetypes maven-archetype-quickstart
Both, Eclipse and Maven do control the dependencies and a few other aspects of the project. For as long as they are in-sync, everything works fine. Good practice is to trust Maven and to try configure the project only via the pom.xml.
- Right click -> Maven -> Update Project…
overwrites Eclipse’s configuration of the project and gives you the chance to check, whether the settings are correct (not completely true, but enough for the beginning)
pom.xml
First, set the correct Java version, for example 11:
<maven.compiler.source>11</maven.compiler.source>
<maven.compiler.target>11</maven.compiler.target>
Then, insert dependencies to JavaFX:
- org.openjfx javax-base
- org.openjfx javafx-controls
- org.openjfx javafx-fxml
- all of the same version, e.g. 15.0.1
Main class
Create a class that extends the javafx.application.Application and that declares a standard main() method, containing only the following:
public static void main(String[] args) {
    launch(args);
}
The start() method that you have to override could contain the following in the first step:
FXMLLoader loader = new FXMLLoader();
loader.setController(this);
loader.setLocation(getClass().getResource("Test.fxml"));
VBox vbox = (VBox)loader.load();
Scene scene = new Scene(vbox);
primaryStage.setScene(scene);
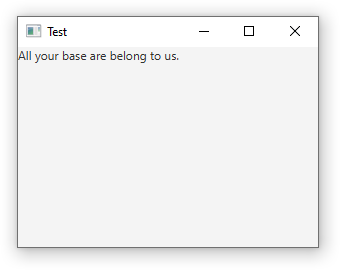
primaryStage.setTitle("Test");
primaryStage.show();
- The class will automatically become a controller of this view.
- This is a dynamic approach. Other possibility would be to declare the controller within the FXML file.
- The view is loaded from the Test.fxml file that is expected in the above example to be located on the classpath in the same package as the surrounding class.
- Why the VBox? This is the main component of the FXML file that we are about to create.
- The VBox will be the main element of the Scene (~ application’s main window).
- Optionally, we can set the title of the window.
- And the show() must go on.
The view
Next, create a new Test.fxml file in the same package:
<?xml version="1.0" encoding="UTF-8"?>
<?import javafx.scene.layout.VBox?>
<?import javafx.scene.control.Label?>

<VBox xmlns:fx="http://javafx.com/fxml/1" prefWidth="300" prefHeight="200">
  <Label fx:id="myLabel" text="All your base are belong to us." />
</VBox>
Assuming that you don’t use any special FXML editor, you need to enter the import statements by yourself.
The controller
The only magic is the id attribute that will automatically wire the label to a corresponding field in the controller’s class. In order to test it, create the field:
@FXML private Label myLabel;
- Make sure, the declaration is preceded with the @FXML annotation.
- Make sure, the name of the field matches the id in the FXML file.
- Make sure, the id in the FXML file is the one declared in the fx-namespace.
How to test it’s working? For example, try to print out the value of the label. Add the line before calling the show() method:
System.out.println(myLabel.getText());
Running
A simple Run as Java Application within Eclipse should do the trick. Most probably you will see the error first:
Error: JavaFX runtime components are missing, and are required to run this application
You need to tell the JVM where to look for the JavaFX modules. This can be achieved by providing this parameter (adapt the /javafx/lib to your needs):
--module-path /javafx/lib --add-modules=javafx.controls,javafx.fxml
Caveats
- The unzipped distribution of JavaFX shall contain all its subfolders, e.g. /bin and /lib, since the platform-dependent dll-s or so-s are to be found under /bin
-
Some of JavaFX releases (e.g. the early access) do name their files in a way they can’t be found (e.g. javafx-base-16-ea+1.jar instead of javafx.base.jar). You can map them by by telling the JVM the correct names:
–patch-module javafx.fxml=/your-path/javafx-fxml-16-ea+1-win.jar –patch-module javafx.controls=/your-path/javafx-controls-16-ea+1-win.jar
Next steps
In the upcoming posts I will cover next steps:
- Creating a model class
- Creating a standalone app
- Serving events (button clicks etc.)
- Customizing components