Making of the Europe XL Scenario
February 24th, 2021The big scenario of Europe is already online. Still being further developed. It was a lot of work until now and here you can read on how it has been created from scratch. The proof of concept, if you like to call it that way, was a smaller scenario of Germany (1024x1024). Lessons learnt out of this task did help me develop better tools for building the big map.
Construction stages
A well-thought-out approach is crucial for good results. It's like assembling Ikea furniture: a mistake may cost you a lot of time having to roll back some of the work. That was my approach (after many fails...):
- Configure base game settings (e.g. starting year).
- Generate the topography, the surface form and features.
- Add rivers and lakes.
- Put some snow on the mountains.
- Mark country borders.
- Create towns and cities.
- Create landmarks (e.g. lighthouses).
- Grow towns and cities to the required size.
- Build industries.
The answer on why this order is so important is to be found in each section below.
Tools
Of course, I did not use the original scenario editor for that. It would take years this way. Basically, the following tools gave me the required support:
- QGis
- Gimp
- Modified OpenTTD
- MS Visual Studio Community 2019
- git, GitHub etc.
- Spreadsheet (e.g. Google Docs Spreadsheet, Apache OpenOffice, MS Excel)
- Text editor (e.g. Notepad++)
Base game settings
Especially the starting year is crucial to get buildings specific to the epoch the game is to be played. So, it must be done before building anything.
Generate the topography
This is the most exciting part of the world generation. I have used the built-in function for importing height maps. Still, it needs correct input data: a bitmap describing the surface of the map:
-
OpenTTD (original code) is able to generate a scenario out of a bitmap.
-
The bitmap should be of the size of the resulting scenario.
For best results, otherwise it would get stretched or squeezed accordingly leading to a loss of quality.
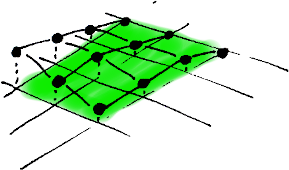
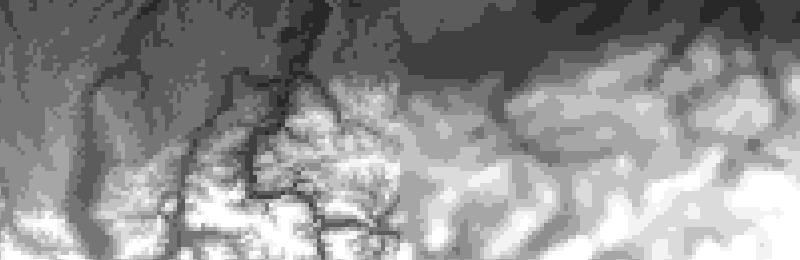
- The luminance of each pixel denotes the height of a respective node on the scenario's map.
The maximum number of expected height levels (selectable during the import process) determines the lightness values of the bitmap. For grey-scaled bitmaps, the 256 possible values are divided by the number of height levels (e.g. 256 / 32 = 8), making 0 (black) equal to the sea level, 8 to be the first level above the sea, 16 the second level and so on...
Color bitmaps are converted to corresponding luminance values (29.9% R, 58.7% G, 11.4% B) before interpreting the values.
- The height difference of directly neighboring nodes in the game must not exceed 1.
This is a really stupid limitation, leading to a number of issues later on: rivers in valleys around high mountains are very hard to get realistically represented.
- The world in game in rotated by 45°.
The small scenario (Germany) was simpler: the North was equal to the upper-left edge. For the big scenario (Europe), I had to put more effort in getting the real North on top of the map, on its upper corner.
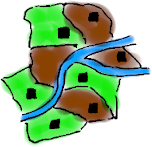
Preparation of the height map

Most of the height maps are drawn using color scale, like in the example above: the sea level is blue, low areas are green, middle are yellow, mountains are red and very high mountains are grey or even white. As you see, a simple conversion to grey scale leads to completely wrong results as the luminance is not monotonic: once getting lighter, once darker. The explanation is simple: the lightness of colors has nothing to do with the heights they represent on the map. It would be possible to use such a map and apply a complex color filter in Gimp to get the right grey tones, but I abandoned it after a lot of trials-and-errors. There is always some color that gets transformed incorrectly.
The answer was to find the real raw height data and generate the bitmap out of it. One of the available sources is:
and it may be used for non-commercial purposes.
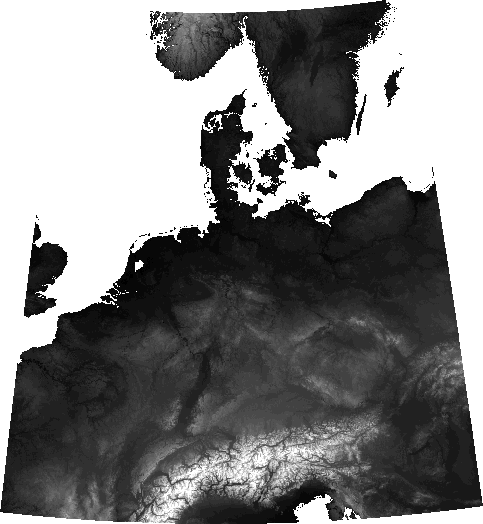
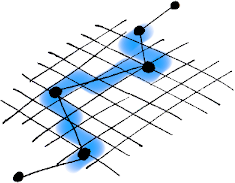
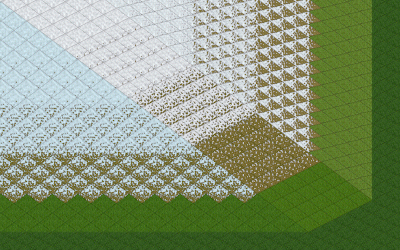
This is the result we want to achieve after importing data (in my case Esri ASCII format) to QGis. The way to there is somehow complex.
- The coordinate reference system for the project is the UTM zone 32N.
The goal is to get a bitmap, where 1 pixel reflects a square area on the ground of the same size no matter the location on the map. The UTM system simply measures meters. The zone number should be the one that is as close as possible to the rendered area. Yes, the area is bigger than the zone, which wouldn't be accepted in cartography. But the approximation for the purpose of the game is still good enough.
- Most of the data imported does use different coordinate systems.
That's why using a tool like QGis is so important: all conversions are done automatically!
-
The grey scale has to be adapted, so that the tiles match each other and - even more important - so that they match the expected grey scale by the scenario editor:
-
The sea level should be black.
- The highest point that will be visible in the game should be white.
- The levels in between can be either linearly spread in between or non-linearly adjusted for more realistic experience.
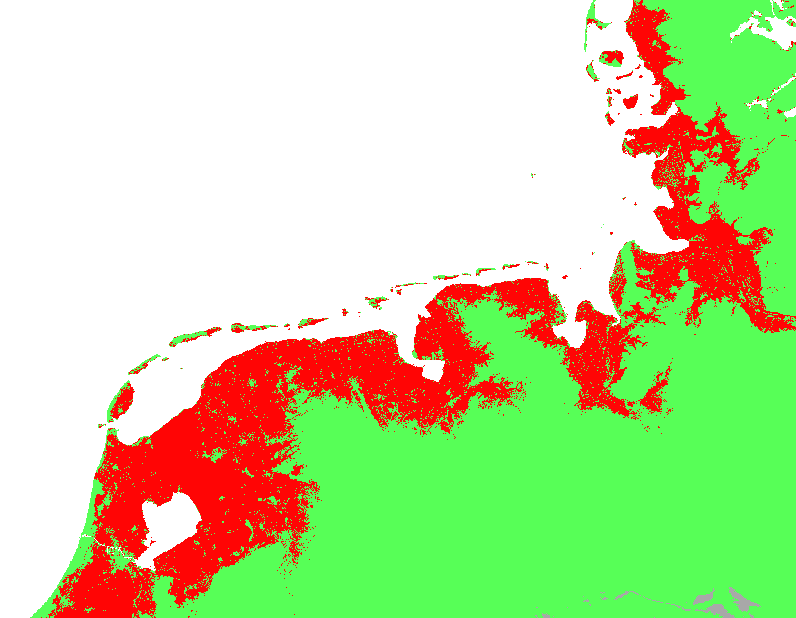
The red area is located below the sea level.
- There are a lot of regions lying below the sea level, especially in the Netherlands. I had to find a good compromise to make it realistic.
The areas lying just a little bit below the sea level are treated as being above the sea. The deeper areas are indeed at the sea level, requiring some additional manual work not to get flooded by the water.
- The linear scale leads to having a very big flat area. Boring.
The result: I had to create my own non-linear scale in several iterations.
The resulting height map has been slightly blurred, so that the edges in the game appear to be softer.
Rivers and lakes
I have implemented additional function in the scenario editor to automate the process of including additional data. The small scenario (Germany) has been created in a different way: via manipulating the scenario file. I have used the game's code to learn the file's structure. Then, implemented a tool that modified the file accordingly to my needs. That was a risky method, because (although a valid structure is created) an invalid world may arise. One needs to take care of all possible relations between the manipulated objects. It's not trivial.
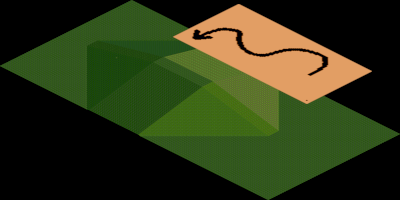
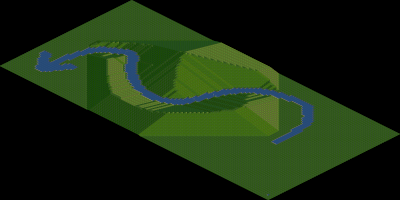
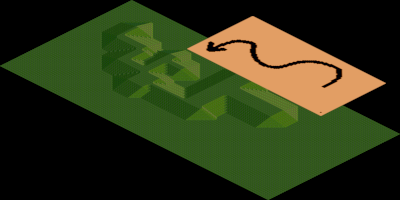
A bitmap with shapes of rivers and/or lakes and a resulting scenario.
For the big scenario (Europe), I have decided to use the game's internal routines to manipulate the game world. This way, correct results are (almost) guaranteed. It was time consuming to develop it due to a bigger learn curve: to understand the code structure and intentions of its creators, to modify the code the way the creators wouldn't hate you for and to invest more time in implementing things in C/C++ as it would be comparing the effort to more user-friendly languages (setting up your environment, so that the project compiles at all; taking care of multi-byte strings; careful memory management etc.).
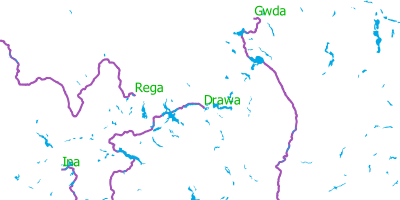
The rivers and lakes in QGis.
There are a lot of databases offering rivers and lakes data. The problem is: many of them offer only the major ones, many of them simplify the shapes so much, they don't fit to the topography anymore and so on... I have used the following sources:
-
Merged hydroedges based on river name by Michela Zanni provides major and secondary rivers in Europe with quite good shape quality without usage restrictions.
-
Lakes of territories in the European region from the EuroGlobalMap, as of October 2016 provides even the smallest lakes in Europe allowing free reuse by acknowledging EuroGeographics as the source, what I do here.
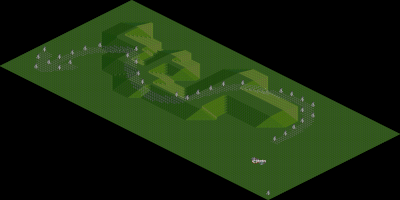
Snow
Yet another custom function has been used to generate snow on the mountains. Yes, there is normally no snow in the temperate climate, but there is a trick to get it. The snow generated this way is ephemeral: as soon as you bulldoze a tile, it won't get any snow anymore. Still, it looks nice. It's important to generate the snow after all terrain shaping works are finished. Otherwise, as already said, on the affected tiles the snow would disappear.
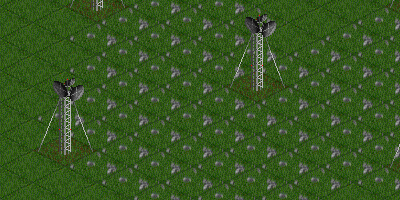
Country Borders
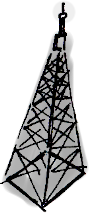
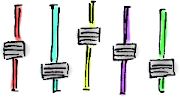
The right time of creating country borders is somehow flexible, depending on the desired effect. I have added them after putting the snow, to get better visibility of the borders in the mountains. Basically, the borders consist of transmitter masts. Sadly, you can't put them on sloped tiles. So the space between the transmitters is marked with stones.
Custom function for importing bitmaps with borders shapes.
Towns and Cities
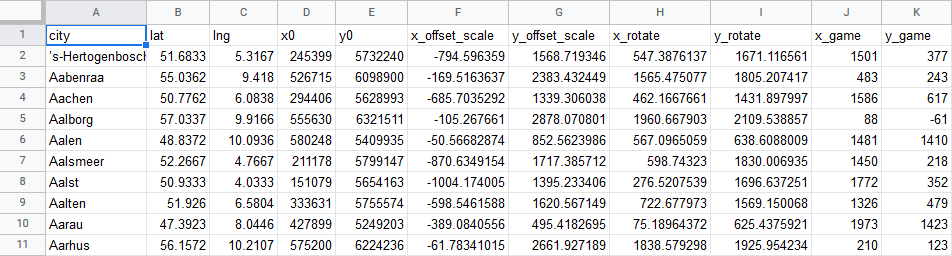
Another custom function made it possible to import towns (cities) in an automated way out of a CSV file.
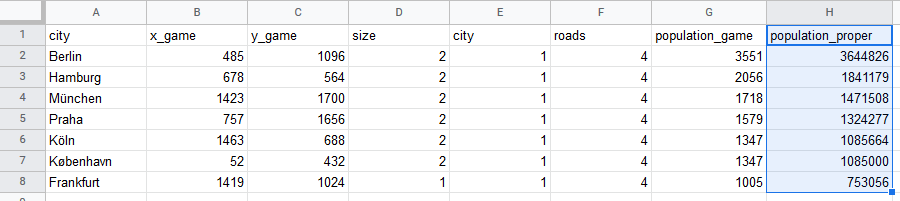
The game needs to know, besides the name and the location of a town, how big the town has to be, whether it is supposed to be a town or a city and what shape of the roads network is to be used. Although no building will be created at this stage, there is an internal value denoting the speed at which each town will grow. This value differs for small, middle and big towns. That's why it is important to provide this information here.
I have used the real population number to map it to the S-M-L town/city scale. The population_game will be used later on. Keep on reading...
The list of the towns has been created in QGis. The selected coordinates have been exported to a spreadsheet and then mathematically rotated by 45° to match the coordinates of the game. Quite simple, but it costed me a few iterations until I have found and solved all the mistakes.
Function ROTATEX(x, y, angleRad)
    ROTATEX = x * Cos(angleRad) - y * Sin(angleRad)
End Function

Function ROTATEY(x, y, angleRad)
    ROTATEY = x * Sin(angleRad) + y * Cos(angleRad)
End Function
Really, not being proud of using the VBA :puke:
The coordinates get converted to meters already in QGis. Then, in the spreadsheet: scaled to the size of the map, rotated by 45 degrees, adjusted to the map offset and filtered out if outside of the relevant range.
Landmarks
This function is still under development for the big map. For the small scenario, I did it almost manually. The coordinates of the light houses have been prepared and exported out of QGis, in a similar way to the towns. Then, text signs have been created at the locations of the light houses. I put light houses on each denoted tile manually. A lot of work... One day there will be a function doing it automatically and the lighthouses will re-appear in the big scenario.
Growing towns
Maybe you have noticed the one but last column in the towns spreadsheet. This is the target population for each town in the game. I've scaled it so that it somehow meets the default town sizes in the game.
A custom function reads the same CSV file again and grows each town until the target size is reached.
I plan to use the blank scenario and call this function each time a new game is started so that the towns look differently each time. That's why this step is performed as one of the very last ones.
Industries
And this is the final step of the scenario preparation. Same as with growing towns, the plan is to do it each time a new game is started in order to provide some randomness.
As of now, the custom function looks for an appropriate location for each of the available industry types and builds them there:
- Oil Rigs on the sea, far away from any shores.
- Farms on a flat land, not disturbing any other farm (leaving enough place for the fields).
- Coal and Iron Mines as well as Oil Wells in mountainous areas.
- Oil Refineries close to shores.
- Factories near to towns.
- Power Stations, Saw Mills, Forests and Steel Mills in all remaining areas.
At the moment, there is no support for NewGRF industries.
NewGRFs
One of the servers is running a NewGRF-variant of the scenario. Basically, it is a bad idea to add NewGRFs within the game (editing a scenario is equivalent to being in the game). The reason is, the NewGRFs do modify the way the game works. If the game makes use of objects that by adding a NewGRF do not exist anymore or have some other function, the results get unpredictable. In best case you don't realize it. In worst case, the game crashes.
I have put a lot of effort ensuring the risk of adding the NewGRFs is very low. The NewGRFs have been configured before adding any buildings or industries.
In order to enable NewGRF modification in the scenario editor, it is necessary to allow it in the config file openttd.cfg:
[gui]
scenario_developer = true
Fonts
The built-in font doesn't offer international characters. And it's ugly. It can be easily changes in the config file openttd.cfg:
[misc]
small_font = Arial
medium_font = Arial
large_font = Arial
Not that Arial is particularly nice, but its default version usually includes characters of many languages.